Introduction
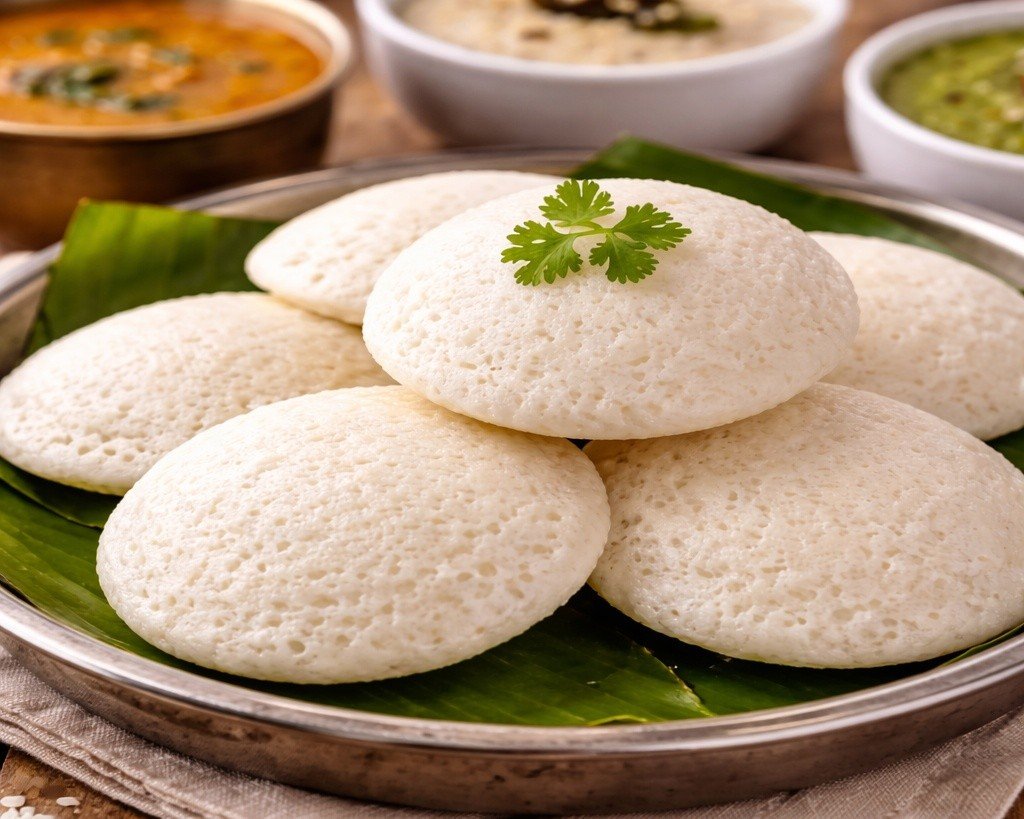
In many Indian homes, mornings begin with the gentle sound of an idli cooker steaming on the stove. Idli is not just food — it is comfort, routine, and childhood memories served on a plate. Whether it’s a busy weekday breakfast, a light dinner, or a tiffin for kids, idli fits effortlessly into our daily lives.
This idli recipe is the traditional, easy way of making soft, fluffy idlis at home — the kind that feels light on the stomach and pairs beautifully with coconut chutney and hot sambar. While idli looks simple, getting the texture right needs patience, proper fermentation, and a little understanding of ingredients.
If you’ve ever struggled with flat or hard idlis, this detailed guide will help you make perfect idlis every single time, even if you are a beginner.
Table of Contents
Calories & Nutritional Information (Per Serving- 2 idlis)
- Calories: 140–160 kcal
- Protein: 4 g
- Carbohydrates: 30 g
- Fat: 0.5 g
- Fiber: 2 g
(Values are approximate and may vary based on rice and urad dal quality)
Health Benefits
Idli is one of the healthiest traditional Indian foods when prepared at home.
- Fermented Food: Improves digestion and nutrient absorption
- Urad Dal: Rich in plant protein and good for energy
- Steamed Cooking: No oil, no frying — light and clean
- Gluten-Free: Suitable for gluten-sensitive diets
- Low Fat: Ideal for weight-conscious and heart-friendly meals
Because idli is soft and non-spicy, it suits all age groups — from kids to elders.
Ingredients Required
For Idli Batter
- 2 cups idli rice (or parboiled rice)
- ½ cup urad dal (split, skinless)
- ¼ tsp methi seeds (fenugreek)
- Water (as needed for grinding)
- Salt to taste
👉 Substitute: a ready-made Idli Batter
For Greasing
- Oil or ghee (very little)
Indian Substitutes:
- Idli rice can be replaced with regular rice + poha (½ cup)
- Rock salt can be used instead of regular salt
Step-by-Step Recipe Method (Detailed & Beginner-Friendly)
Step 1: Washing the Rice and Dal Properly
Take idli rice in a large bowl. Wash it 3–4 times until the water runs mostly clear. This removes excess starch and helps fermentation.
In another bowl, wash urad dal gently 2–3 times. Add methi seeds to the dal while washing.
👉 Tip: Always wash rice and dal separately. Urad dal needs gentler handling.
Step 2: Soaking for the Right Texture
Soak rice in enough water for 6–8 hours.
Soak urad dal and methi seeds together for 4–6 hours.
Proper soaking is crucial — it softens the grains and helps the batter grind smoothly.
Step 3: Grinding the Urad Dal Batter
Drain the urad dal completely. Grind it first using a wet grinder or mixer.
- Add water little by little
- Grind until the batter becomes smooth, fluffy, and light
- Texture should be thick but airy
👉 Tip: The urad batter should feel light when touched — this decides idli softness.
Transfer this to a large bowl.
Step 4: Grinding the Rice Batter
Now drain the rice and grind it separately.
- Add water slowly
- Grind to a slightly coarse but smooth texture
- Batter should not be too thick or watery
Mix the rice batter with urad dal batter gently using your hand.
Step 5: Mixing & Adding Salt
Add salt to the batter and mix well using clean hands. This helps fermentation evenly.
The batter consistency should be thick but flowing — like thick dosa batter.
Step 6: Fermentation – The Heart of Good Idli
Cover the bowl loosely and keep it in a warm place for 8–12 hours.
- In summers, fermentation happens faster
- In winters, keep the batter inside the oven (light on) or near the stove
Once fermented, the batter will rise, look airy, and smell mildly sour.
👉 Tip: Do not stir the batter too much after fermentation.
Step 7: Preparing the Idli Plates
Grease idli moulds lightly with oil or ghee. This prevents sticking and adds flavour.
Gently pour batter into each mould — do not overfill.
Step 8: Steaming the Idlis
Heat water in an idli cooker or large vessel. Once water starts boiling:
- Place idli stand inside
- Cover with lid
- Steam on medium flame for 10–12 minutes
👉 Check: Insert a toothpick — it should come out clean.
Step 9: Resting & Removing Idlis
Switch off the flame and let idlis rest for 2 minutes.
Remove using a spoon dipped in water.
Soft, fluffy idlis are ready!
Pro Tips, Variations & Substitutes
- Extra Soft Idlis: Add 1–2 tbsp cooked rice while grinding
- No Fermentation in Winter: Add a pinch of sugar before fermenting
- Rava Idli Option: Use sooji with curd and ENO for instant version
- Brown Rice Idli: Replace white rice with brown rice (soak longer)
- Mini Idlis: Perfect for kids’ tiffin boxes
Serving Suggestions
Idli tastes best when served hot with:
- Coconut chutney
- Red chutney
- Tomato chutney
- Sambar
- Idli podi + ghee
- Curd for a light meal
Perfect for breakfast, dinner, or lunchbox.
Storage & Shelf Life
- Fermented Batter: Refrigerate up to 2 days
- Steamed Idlis: Consume fresh for best texture
- Reheating: Steam lightly or microwave covered
Avoid freezing idli batter.
Frequently Asked Questions (FAQs)
Usually due to thick batter or under-fermentation.
Yes, use regular rice + poha.
8–12 hours depending on temperature.
Yes, but grind urad dal very smoothly.
Yes, when eaten in moderation with healthy sides.
Not recommended for traditional idli.
Final Thoughts
Idli is proof that simple food can be deeply satisfying. When made at home with care, it becomes more than just breakfast — it becomes a habit you look forward to. Once you understand the batter and fermentation, idli making feels effortless.
If you try this idli recipe, I’d love to hear how it turned out. Drop your questions, tips, or variations in the comments. Don’t forget to share this recipe with someone who loves soft, fluffy idlis as much as you do.
Happy steaming and happy eating!